Semantic Image Segmentation to customize your video
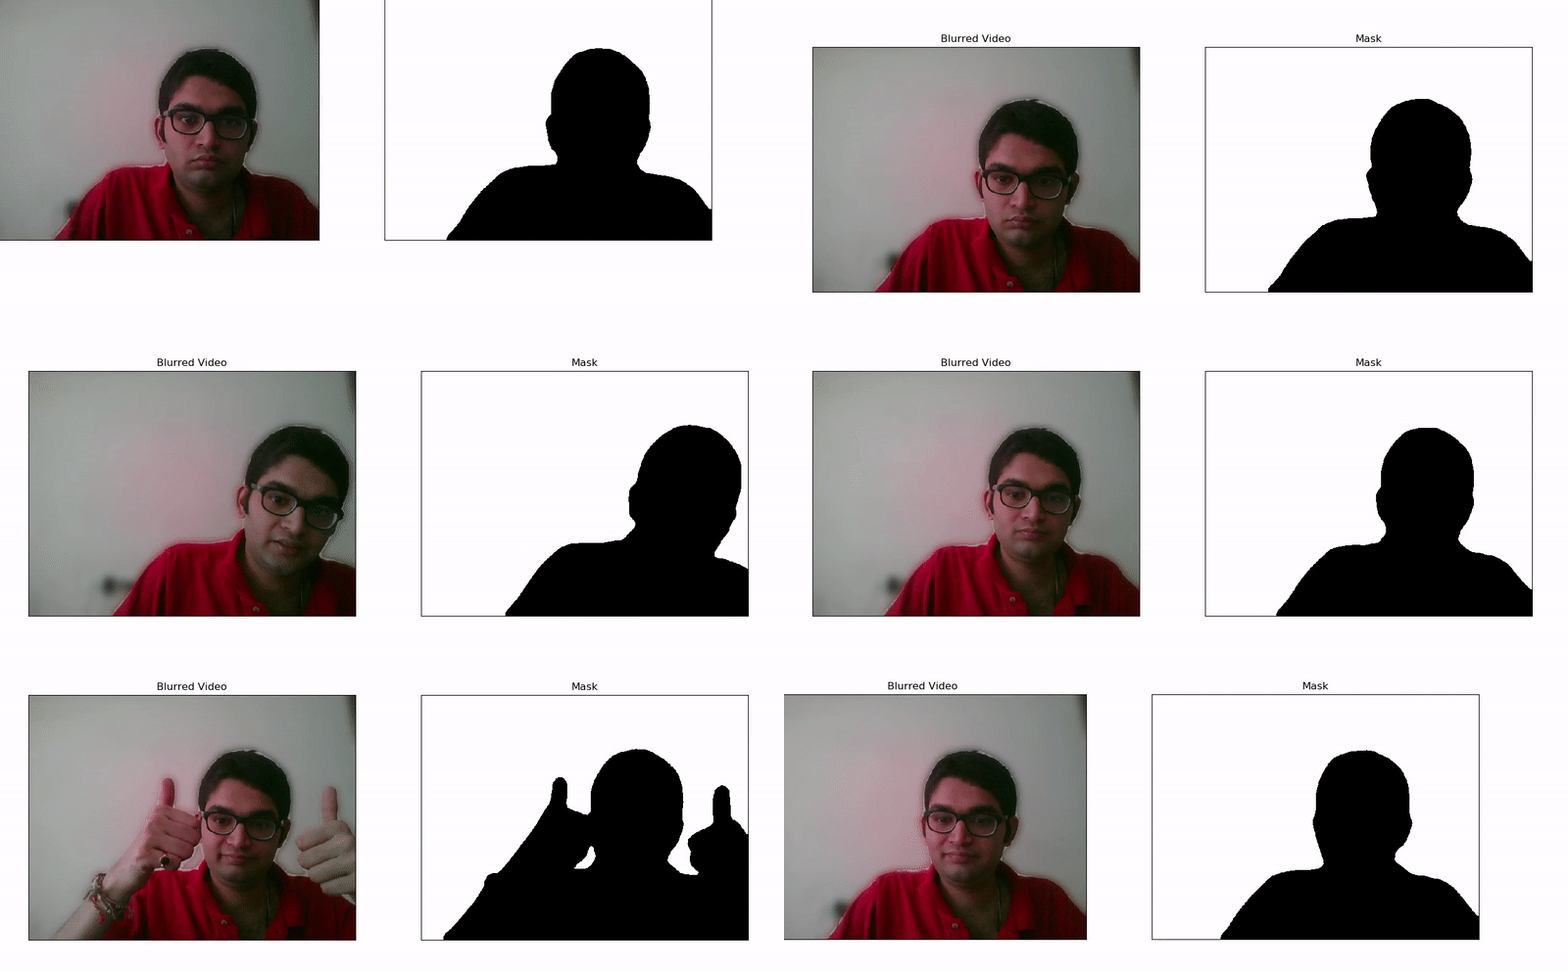
Written: 13 Dec 2020 by Vinayak Nayak 🏷 ["deep learning"]In this post, we shall see how to build your own custom functionality for blurring/background modification in your videos as follows

Introduction
With the surge in use of video calling services during the COVID lockdown, many players are offering a service where the user of the service could blur the background or add a custom background etc. (Zoom, MS-Teams etc.) This is a classic use case of image segmentation where the object of interest is located and the pixels barring this region are modified/substituted.
There are many deep learning architectures which could be used to solve the instance segmentation problem and today we’re going to useDeeplab-v3 which is a State of the Art semantic image segmentation model which comes in many flavors. Its goal is to assign semantic labels (e.g., person, sheep, airplane and so on) to every pixel in the input image. We are going to particularly be focusing on using the Deeplabv3 model with a Resnet-101 backbone that is offered out of the box with the torch library.
We’ll go about building this in a step by step fashion as follows:
- Dependencies needed
- Using cv2 to set up a video session and prepare output screens
- Using deeplab for predicting labels
- Applying segmentation (labels) map and blurring
- Bonus: Using custom background
So without any further ado, let’s get started!
Dependencies
For reproducing the code below, we will need to have python installed on our system and in addition to that we will also need the following:
- torch
- Pillow
- numpy
- matplotlib
- cv2
These could be simply installed by using the command
pip install packagename
If you’re working with conda, I would recommend you create a separate environment for this project using the following command. You can choose a higher version for python as well by changing the last portion to python=3.7 or python=3.8 etc.
conda create -n deeplabenv python=3.6
Once you install the above packages, we’re ready to go to the next step.
Getting Input & Setting the stage for Output
We will be using opencv to interface a webcam for reading in input from our screens and we’ll use matplotlib’s pyplot module to render the processed video feed to output.
opencv’s VideoCapture object is used to get the image input for video. If you have multiple webcams you could create multiple such objects by passing the appropriate index; by default nowadays, most monitors have one inbuilt camera which could be indexed at 0th position.
Subsequently, opencv reads images in a BGR format but while rendering we need to show it in RGB format; so we’ve written a tiny function that captures a frame in realtime and converts it from BGR format to RGB format above. With this, we’re set with the input preprocessing steps. Let’s look at how we’ll set the stage for output now.
Why use matplotlib.pyplot and not cv2.imshow? There are some inconsistencies with cv2.imshow when it comes to ubuntu distributions; I had one such issue which caused me to look at alternate methods and since pyplot is easy to implement and mostly included with all major python distributions like anaconda by default, I thought of using pyplot for rendering the output.
So basically we set up two subplots as seen in the gif on the top; one to see the blurred version and another one to actually look at the labels mask which the deeplab model has predicted. We switch on the interactive mode for pyplot and display the image captured directly at the very beginning of the stream. Now, that we have the stage set, let’s discuss the part to obtain predictions from the deeplab-v3 model.
Deeplab-v3 Segmentation
The model offered at torch-hub for segmentation is trained on PASCAL VOC dataset which contains 20 different classes of which the most important one for us is the person class with label 15.
Using the above code we can download the model from torch-hub and use it for our segmentation task. Note that since this is based on top of a Resnet-101 model which is quite heavy, the inference will take time and rendering will lag heavily if you do not have a medium sized GPU if not a high end one. Now that we have the model loaded, let’s discuss how we could get predictions from it.
We will first load the image using Pillow or directly get it from the VideoCapture object of cv2 defined above. Once we have this, we will normalize it using imagenet stats and convert it to a tensor. Then if we have a GPU available at our disposal, we can move the tensor to GPU. All pre-trained models expect input images in mini-batches of 3-channel RGB images of shape (N, 3, H, W), where N is the number of images, H and W are height and width of the two images respectively. Since our video capture object captures single frames, it’s output is (3, H, W). We therefore unsqueeze the tensor along the first dimension to make it (1, 3, H, W).
Once we do that, we then put the model in eval mode and without autograd perform a forward pass through the same. The forward pass gives auxand out objects from which, the out object is of interest to us during inference. The aux values have loss value per pixel and are useful during train time. So, we get the out object and do a argmax along the 1st dimension to obtain the labels map which is of the same height and width as the original image with a single channel. This mask could be used for segmentation which we’ll look at in the next section.
Human Segmentation
Now that we have the predictions, we can use them for segmenting the human and blurring the background.
The labels extracted out of the image are two dimensional. We need to replicate this mask across all three channels i.e. RGB. So, we use numpy to repeat this segmentation mask across all three channels.
Next, we use opencv’s Gaussian Blur to blue the entire frame output and get a new image called blur. The extent of blur is determined by the blur_value variable which is a tuple representing the kernel size for blurring. Higher the value, more the blur and vice versa.
Next, with the help of mask, we replace the background pixels of the frame with the blurred frame’s pixels. Now that we have both the mask and the resulting manipulated frame, we set the data of the two image variables defined in the Setting the stage for output section to these two frames respectively and define an interval for interactive pyplot object for refreshing the frame (think of it as an equivalent of frame rate).
This is how you could use DeepLabv3 for making your very own background blurring feature on custom videos or live vidcams with Image Segmentation.
Bonus: Background Substitution with custom image
Just like we blurred the background above, we could also substitute the background with a custom image and it only requires some minor modifications to the code.
We read a background image of our choice for substitution using cv2 and bring it to RGB format. Next, in the part where we replace the frame’s non-human pixels with blurred pixels, we now use this background image pixels instead.
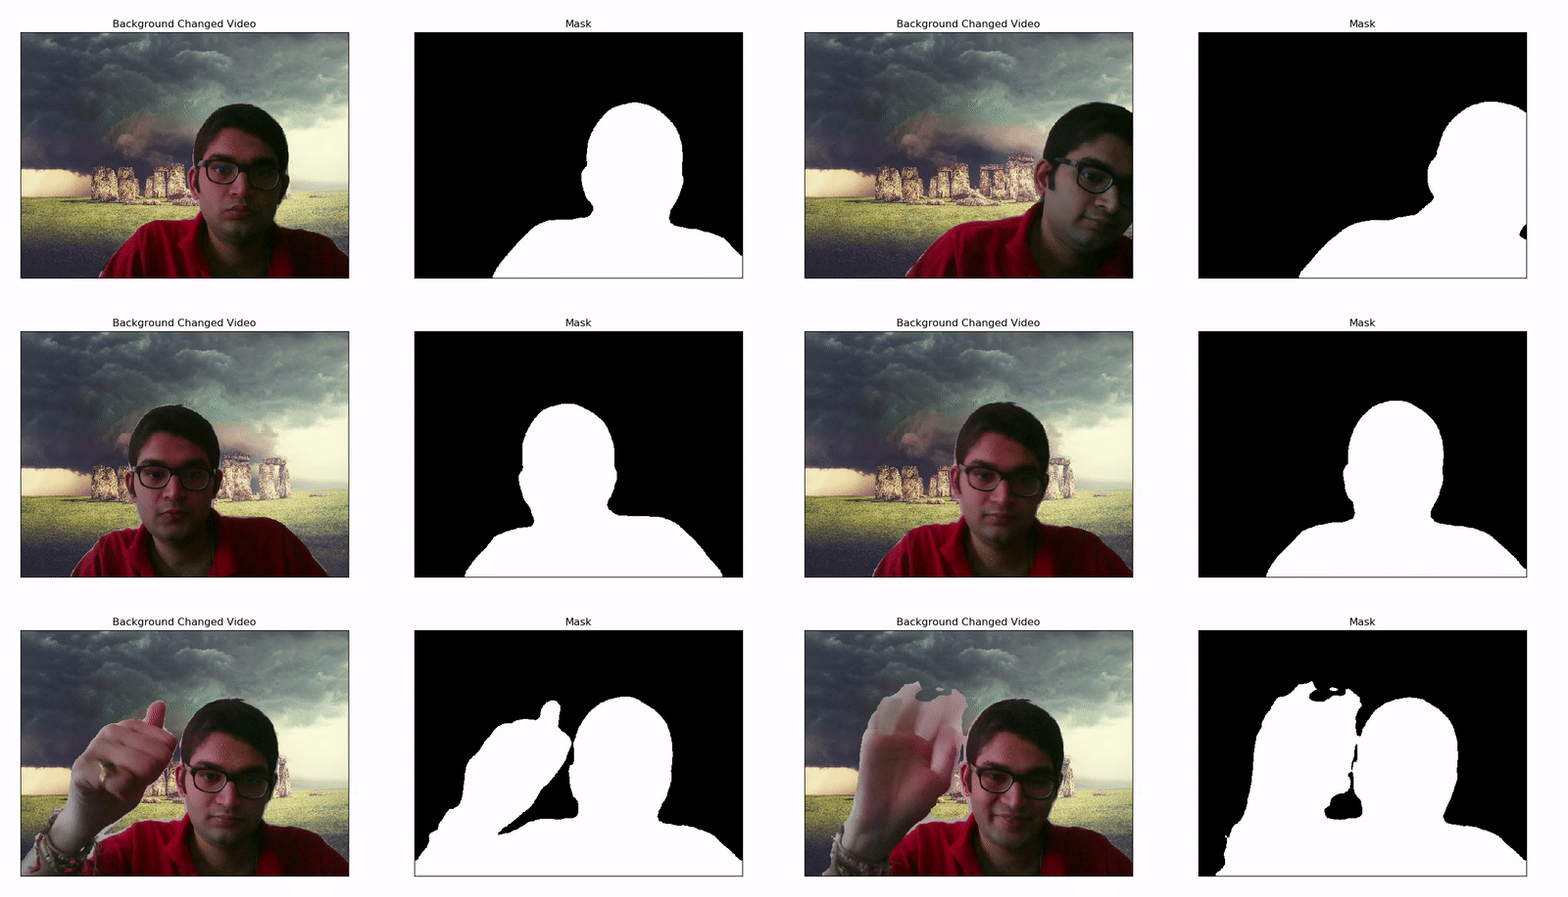
Basically, we resize the background image to fit the frame capture source or the video source, then mask all the human pixels in this image with the frame’s human pixels. This gives the source human overlaid on top of the background image like shown in the gif below.

Hope you enjoyed reading this post as much as I did while writing it. If you want to read further, I’ve mentioned some links in the resource section which may prove helpful. Cheers!
